Note that this setup is Optional. You can still use the tool perfectly fine without it!
You should only store your token in the $HOME/osmedeus-base/token/osm-var.yaml file. Modify the ~/.osmedeus/config.yaml will work but you will lose your token when the next time you run the reload command.
Notification with Telegram with Osmedeus Script
1. Create a Telegram Bot
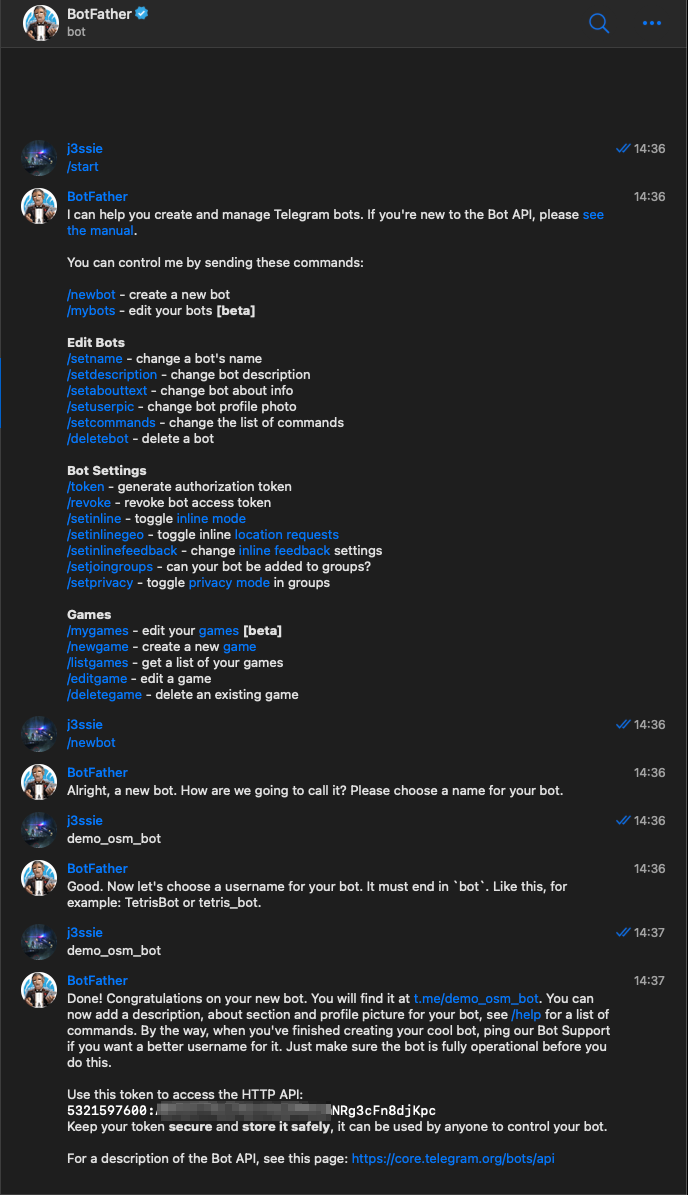 Follow this guide to generate your API token
2. Create a Telegram Channel
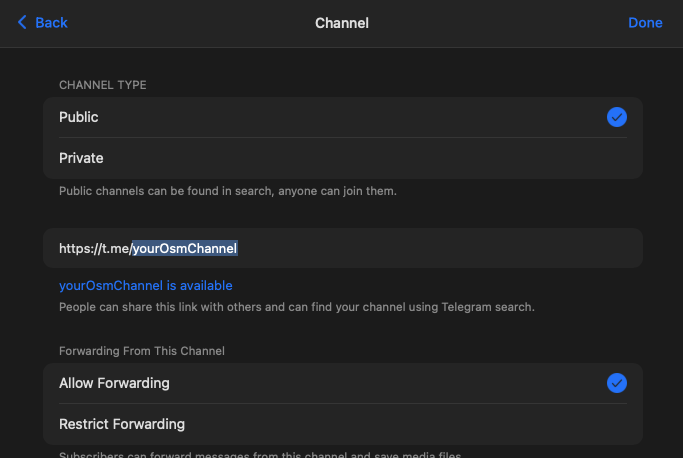 Create a channel and add your bot to it. Keep it Public until you get the channel ID.
3. Get your channel ID
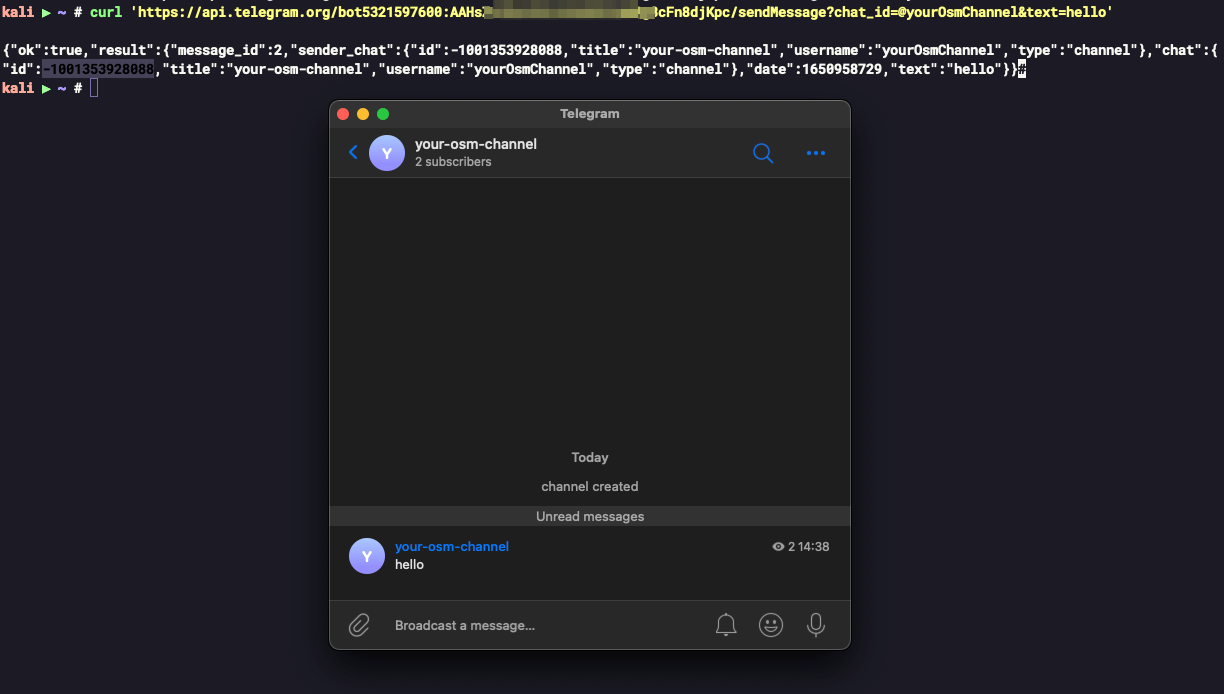
run the command below to get your channel ID (make sure you replace the <your-telegram-token> and <your-bot-URL-at-step-1> with your own):
export TELEGRAM_API_TOKEN=<your-telegram-token>
export BOT_URL=<your-bot-URL-at-step-1>
curl 'https://api.telegram.org/bot5321597600:$TELEGRAM_API_TOKEN/sendMessage?chat_id=@$BOT_URL&text=hello'

# or you can use this command if you have the channel ID already where `1001270311111` is your channel ID
curl -X POST \
     -H 'Content-Type: application/json' \
     -d '{"chat_id": "-1001270311111", "text": "hello"}' \
     https://api.telegram.org/bot$TELEGRAM_API_TOKEN/sendMessage
the output should look like this
{"ok":true,"result":{"message_id":2,"sender_chat":{"id":-1001353928111,"title":"your-osm-channel","username":"yourOsmChannel","type":"channel"},"chat":{"id":-1001353928111,"title":"your-osm-channel","username":"yourOsmChannel","type":"channel"},"date":1650958729,"text":"hello"}}
id field. In this case, it should be -1001353928111. Make sure you include the - in front of the channel as well.
4. Put your bot API key and channel ID in the $HOME/osmedeus-base/token/osm-var.yaml file
Now add the API Key and channel ID to the $HOME/osmedeus-base/token/osm-var.yaml file.
## run this command to get channel ID: curl 'https://api.telegram.org/bot$TELEGRAM_API_TOKEN/sendMessage?chat_id=@osmChannelName&text=hello'
## {"ok":true,"result":{"message_id":2,"sender_chat":{"id":-1001353928111,"title":"your-osm-channel","username":"yourOsmChannel","type":"channel"},"chat":{"id":-1001353928111,"title":"your-osm-channel","username":"yourOsmChannel","type":"channel"},"date":1650958729,"text":"hello"}}
## --> your channel ID is '-1001353928111'

notification:
    client_name: CLIENT_NAME
    slack_diff_channel: SLACK_DIFF_CHANNEL
    slack_report_channel: SLACK_REPORT_CHANNEL
    slack_status_channel: SLACK_STATUS_CHANNEL
    slack_webhook: SLACK_WEBHOOK
    telegram_channel: TELEGRAM_CHANNEL
    telegram_dirb_channel: TELEGRAM_DIRB_CHANNEL
    telegram_mics_channel: TELEGRAM_MICS_CHANNEL
    telegram_report_channel: TELEGRAM_REPORT_CHANNEL
    telegram_sensitive_channel: TELEGRAM_SENSITIVE_CHANNEL
    telegram_status_channel: TELEGRAM_STATUS_CHANNEL

tokens:
    GITHUB_TOKEN: GITHUB_TOKEN
    GITLAB_API_TOKEN: GITLAB_API_TOKEN
    SLACK_API_TOKEN: SLACK_API_TOKEN
    TELEGRAM_API_TOKEN: 1111111100:AAGx
You may also noticed that there are some telegram channels in the osm-var.yaml file. You can set all of them to the same channel ID for simplicity.
But if you want to have more visibility, repeat steps 2 and 3 above to have more channel ID and add it to the osm-var.yaml file.
5. Run the test workflow to see everything is working fine
osmedeus scan -m ~/osmedeus-base/workflow/test/noti.yaml -t sample.com
Check your telegram channel to see any message is sent.
6. See what noti scripts use in the workflow.
By default the notification script already setup in the workflow, you will automatically see the notification when the scan is done.
You can also search TeleMessByFile script in the workflow which will send the message as the content of a file to a specific channel.

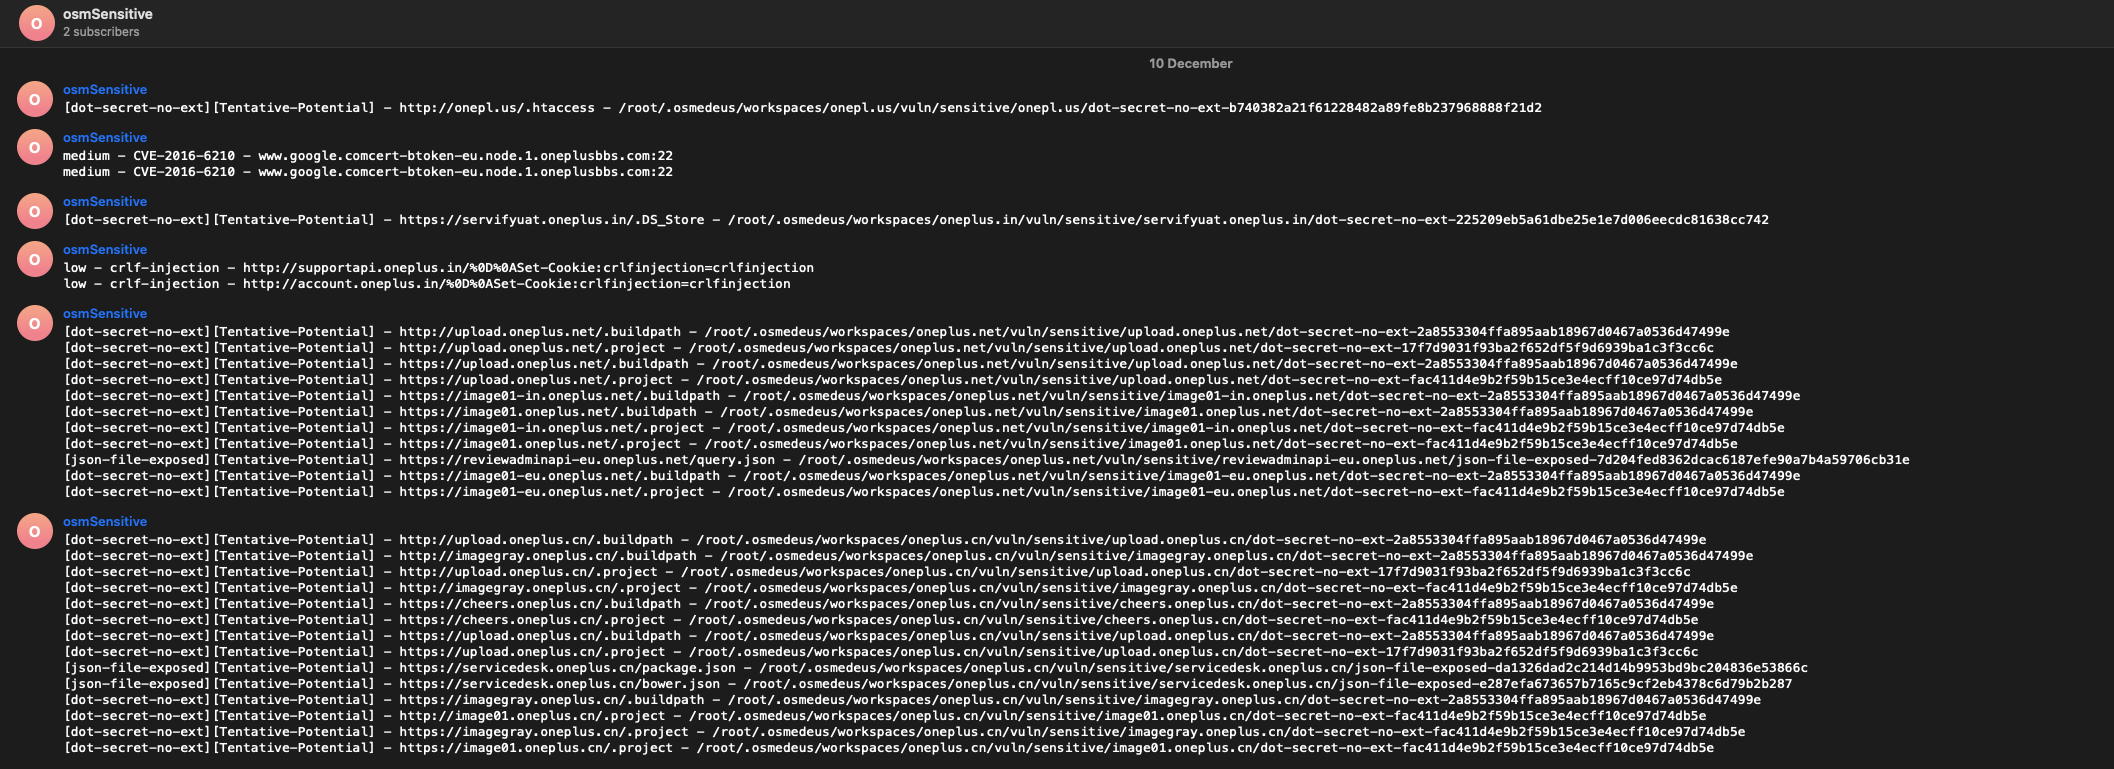 Here is how the real results looks like.
You can see more usage of notification scripts here
notification:
    client_name: CLIENT_NAME
    telegram_channel: TELEGRAM_CHANNEL
    telegram_dirb_channel: TELEGRAM_DIRB_CHANNEL
    telegram_mics_channel: TELEGRAM_MICS_CHANNEL
    telegram_report_channel: TELEGRAM_REPORT_CHANNEL
    telegram_sensitive_channel: TELEGRAM_SENSITIVE_CHANNEL
    telegram_status_channel: TELEGRAM_STATUS_CHANNEL


# this will send the file '{{Output}}/vuln/sensitive/sensitivescan-{{Workspace}}-{{TS}}.txt' to the channel TELEGRAM_SENSITIVE_CHANNEL above
- TeleMessByFile("#sensitive", "{{Output}}/vuln/sensitive/sensitivescan-{{Workspace}}-{{TS}}.txt")


# this will send the file 'Start the scan {{Target}}' to the channel TELEGRAM_MICS_CHANNEL above
- TeleMess("#mics", "Start the scan {{Target}}")
Notification with CLI tool
Another method to integrate notifications into the workflow involves utilizing a notification CLI such as notify developed by projectdiscovery.
The configuration file for notify will be stored at $HOME/osmedeus-base/data/external-configs/notify-provider.yaml.
In your workflow, you can include something similar to the following, which will transmit the data to your designated channel.
- ExecCmd("{{Binaries}}/notify -pc {{Data}}/external-configs/notify-provider.yaml -silent -bulk -data {{Output}}/vuln/active/activescan-{{Workspace}}-{{TS}}.txt > /dev/null 2>&1 ")